INSTRUCTIONS
Image PREP
All of your Galleries are set to a 2:3 crop, so when you are preparing sculpture images, starting from centering them to that and keeping to that ratio is a good idea.
I like to size images to approximately 900 x 1200 px at 72 dpi but then run them through TinyPNG to compress them further.
The goal is to keep your images to about 250 - 400 KB. That’ll make sure your site loads nice and fast, which is especially important for mobile users.
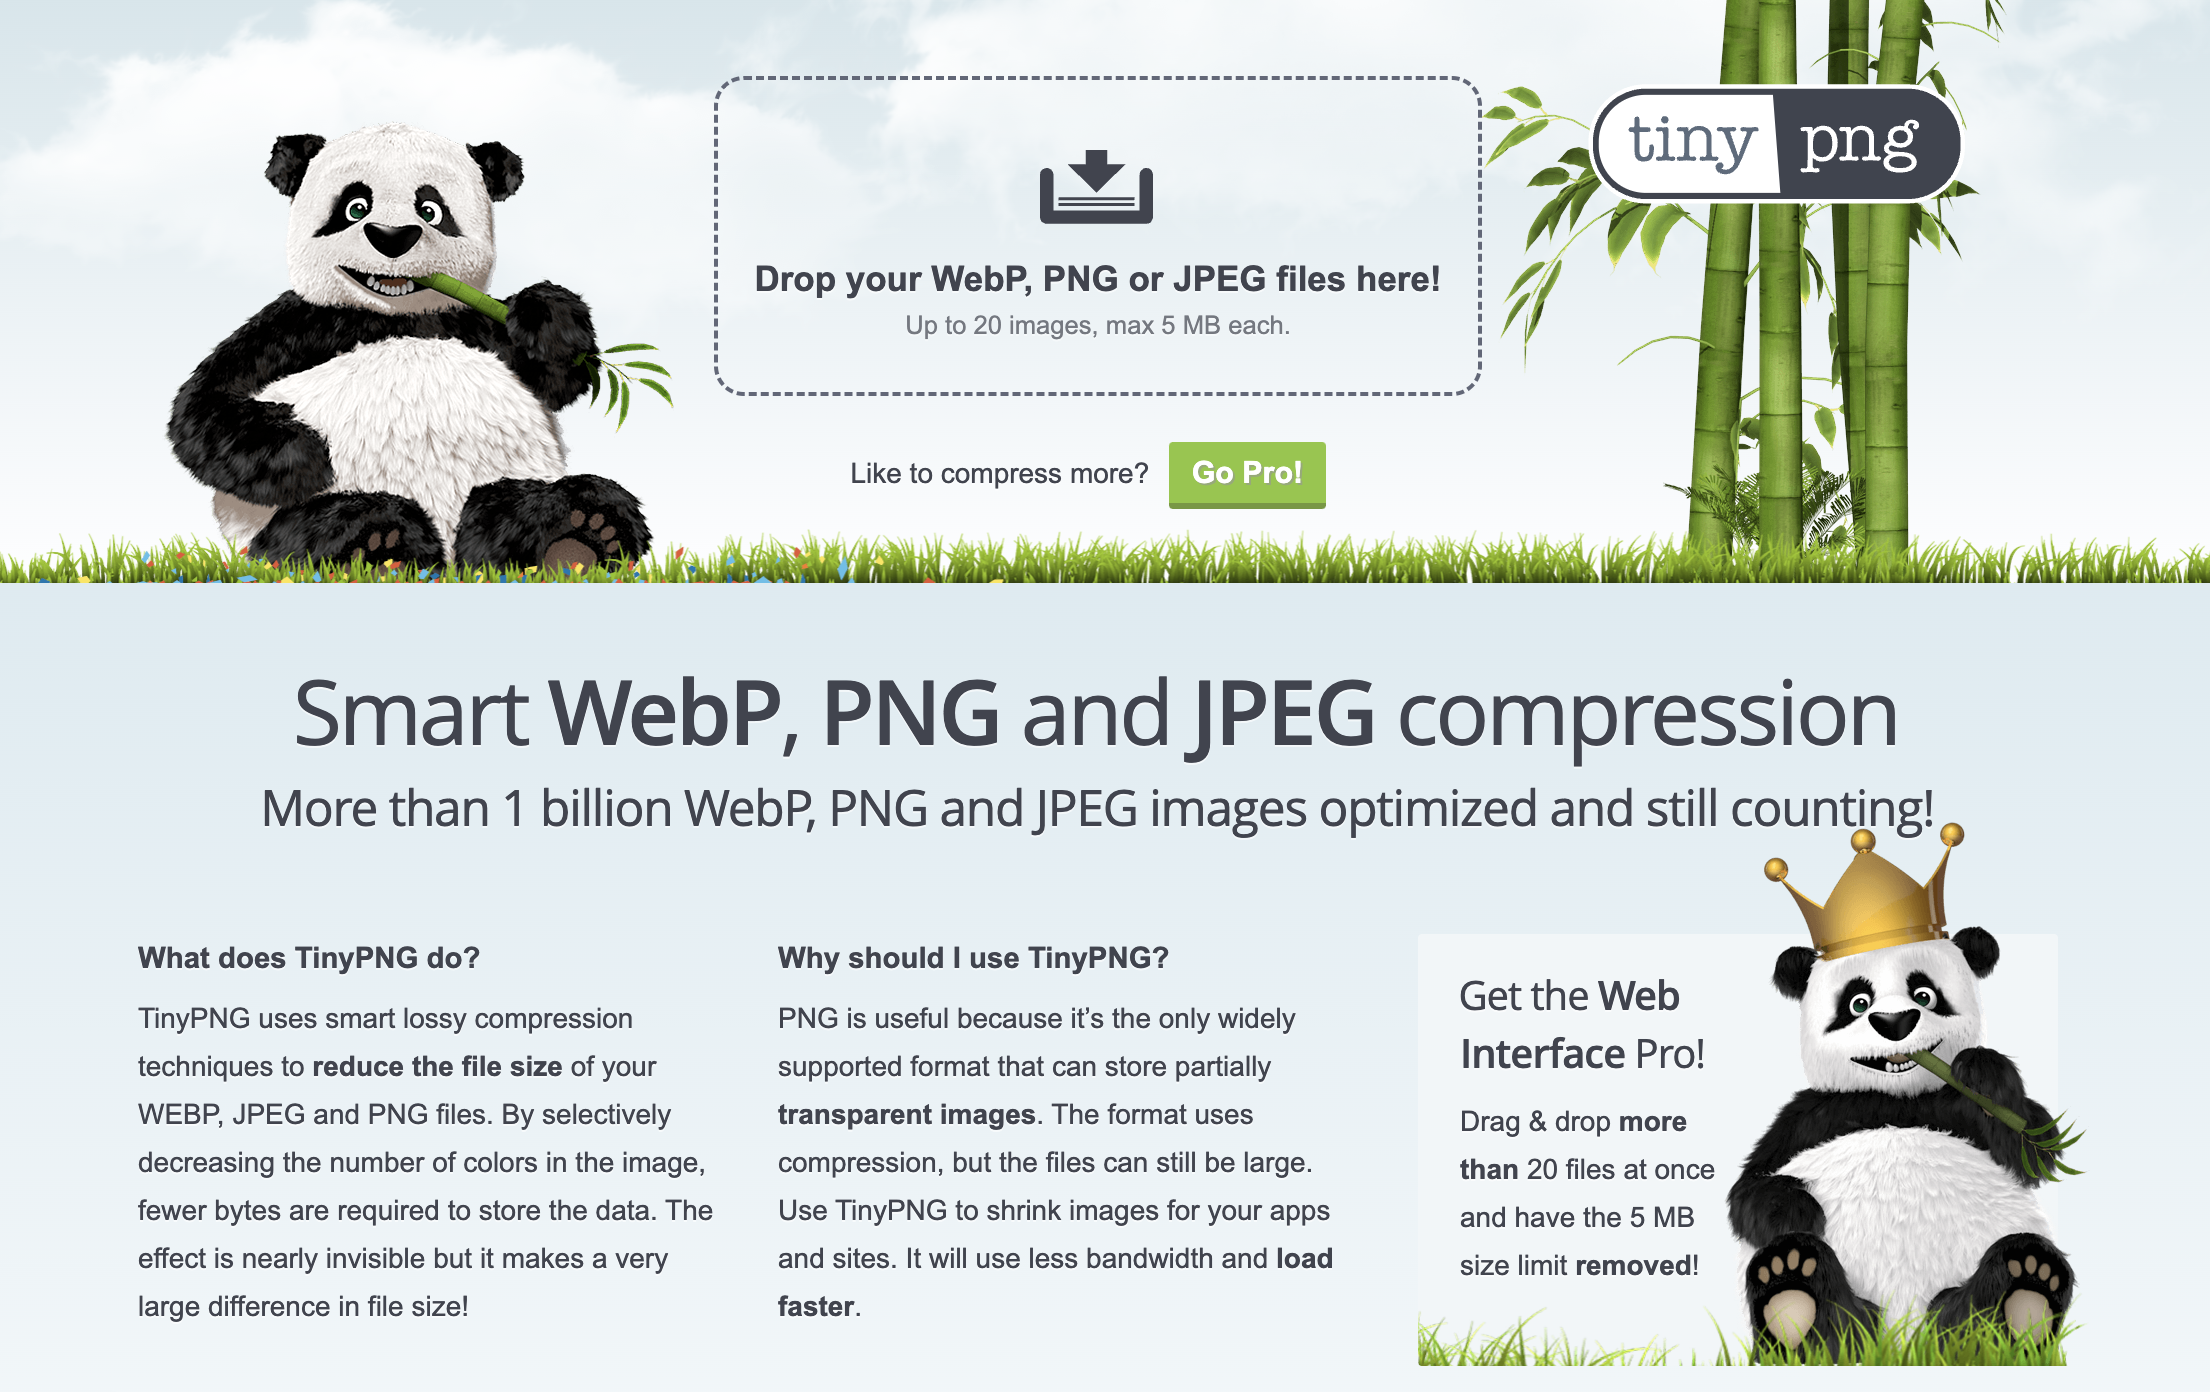
Image UPLOADS
Everything on your site is a “BLOCK” : text blocks, image blocks, line blocks, shape blocks; etc.
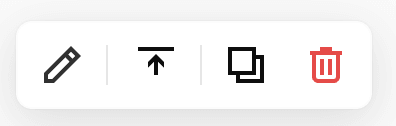
When you click on a block, a mini menu pops up. The pencil is EDIT, the next is the orientation (default is TOP), the next is DUPLICATE, and the last is DELETE. If you click two times on a text block, that edits the appearance of text, but that’ll be later.
The images on your Available and Archive pages are in GRID Gallery blocks (There are other places where it uses CAROUSEL Gallery blocks, like on the slide of photos at the bottom of your bio page.)
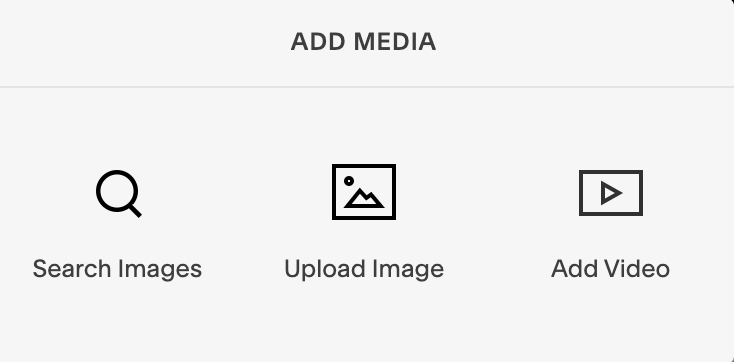
When you click EDIT on a Gallery block, it will expand to the first image on the right. If you click the little + sign, you can ADD (UPLOAD) a new image (another option is to use your site’s own LIBRARY). If you scroll down, you will see alt way to upload images to the Gallery.
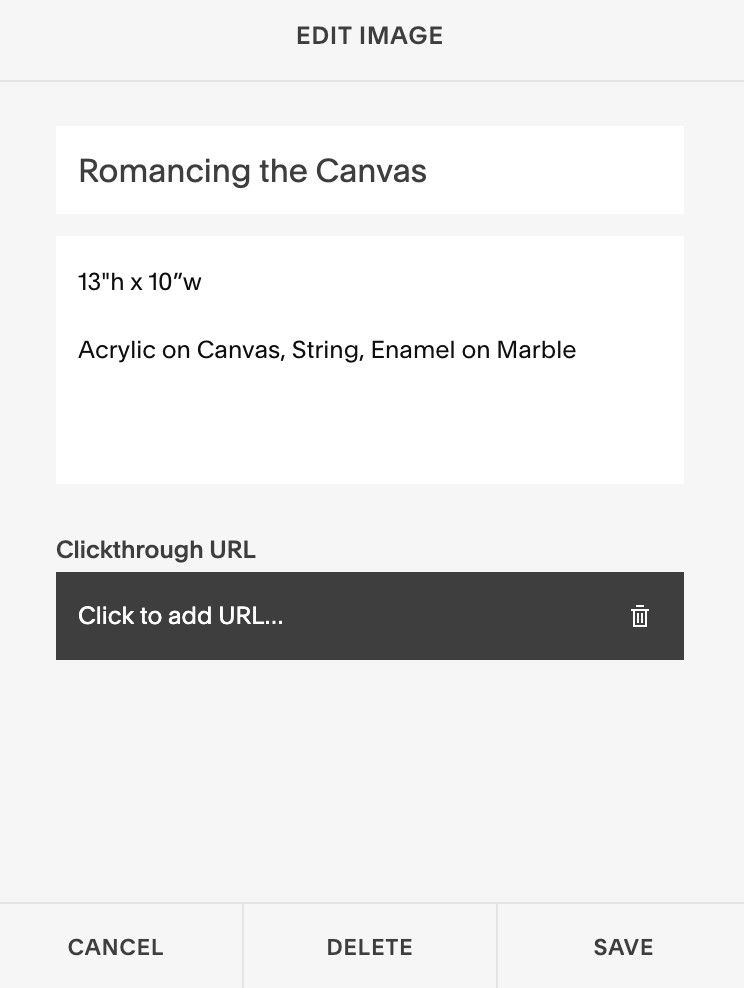
Clicking on an individual image will bring up another mini pop up menu. The little circle/gear thing is SETTINGS. Then the pencil EDIT and DELETE.
SETTINGS is all of your image’s info; right.
That is where all of your CAPTION info goes.
EDIT brings up the image EDITOR; below.
DELETE it from the Available gallery when it’s sold, and then ADD it to the 2021-Present Archive.

You’ll notice two headers: CONTENT and DESIGN. For the most part, you only need to worry about CONTENT.
It’s a pretty decent editor. You can use this if one of the images in your gallery is looking a little dark, dull, or fuzzy. You can also CROP an image (you’ll want to make sure you stick to that 2:3 ratio), or apply a FILTER. You toggle through these options at the very top-right.
Say you removed an image from the Available Works page and you want to add it into the Archive page:
Go to your appropriate Archive page, click to EDIT the page, click on the Gallery to EDIT the Gallery, ADD an image, UPLOAD the image from here, or select it from the LIBRARY (you’ll have to scroll around a bit to find it), add the CAPTION information, and voila!
TEXT

When you click two times on a TEXT block, you get the text menu above. The little lightning symbol is for Generative AI. That’s very new. Next is the type of text you would like to add, i.e., HEADING, PARAGRAPH, etc. Each of those has a couple of categories that descend in size. You can take a look at your SITE STYLES page for reference. The rest is pretty self-explanatory, and if you want to play around with it, on the right, I had ChatGPT write a little about “The differences between Italian and French Sculpture in the 15th Century.” Just click EDIT at the top of this page, scroll down, and have fun!
One thing that is a little tricky is your Exhibitions Page. You’ll notice, when you type, that when you hit ENTER or RETURN to start a new paragraph, it automatically adds more space. So, say you are writing a list, and one line of that list goes long:
Desktop View, Mobile View, and Site Styles
First, get yourself into the MOBILE EDIT VIEW so you can see what text, if any, is overhanging. You’ll need to put each of the lines on its own line, so you don’t get that big jump. Go where you want the line break and click SHIFT+RETURN (on Mac).
If you then want to indent that second line, use the spacebar to move the text in a few steps. In the case to the right, it was three punches of the spacebar. You can try it with item #2 in ChatGPT’s list of important 15th-Century Italian sculpture.
In the 15th century, Italian and French sculpture differed significantly in terms of their style, techniques, and subject matter. Italian sculpture during this period was known for its emphasis on classical and naturalistic forms, and the use of marble and bronze as preferred materials. Florence, in particular, was the epicenter of Renaissance sculpture, where artists such as Donatello and Michelangelo created iconic works such as David and the Pieta. Italian sculptors paid close attention to details such as anatomy, proportion, and realistic expression, which were heavily influenced by ancient Greek and Roman sculptures.
In contrast, French sculpture during the same period was more Gothic in style, with an emphasis on narrative and emotion, often depicted in the form of religious images and symbols. French sculptors used stone, wood, and bronze, and their work often featured elegant drapery and intricate detail, such as the intricate rose window designs found on the facade of Notre Dame. French sculptors also incorporated elements of medieval symbolism, including grotesque figures, monsters, and animals, which played a prominent role in Gothic art. Overall, while both Italian and French sculpture shared some common themes and motifs, the differences between the two styles were stark and reflected the unique cultural, artistic…
1. David by Donatello: The life-size bronze statue of David was
created by Donatello in the early 1430s and is widely
considered to be one of the greatest masterpieces of the
15th-century Italian Renaissance.
2. Pieta by Michelangelo: The Pieta is a marble sculpture created by Michelangelo in 1498–1499, located at St. Peter's Basilica in Vatican City. It depicts the Virgin Mary cradling the dead body of Jesus Christ after his crucifixion.
ADDING EMAILS
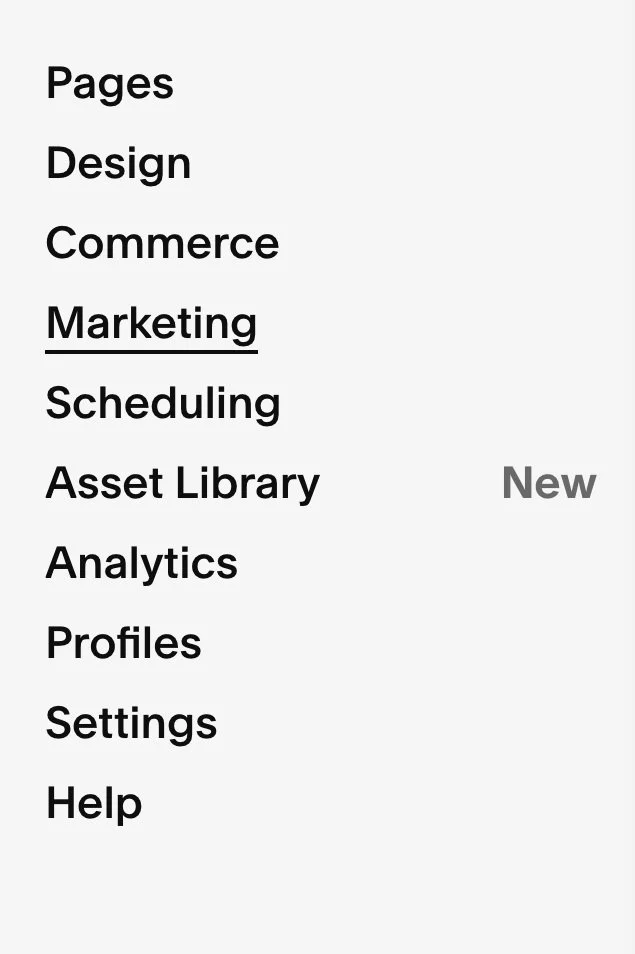
First MENU step:
MARKETING
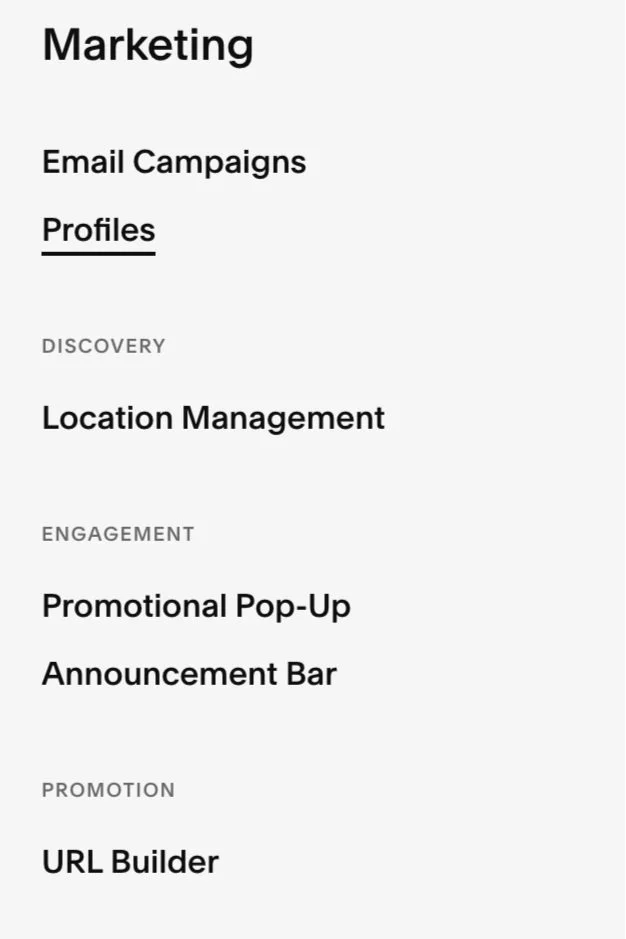
Second MENU step:
PROFILES


Once you’re in your subscriber and customer profiles, go all the way to the top-right and click ADD SUBSCRIBERS. A window (right picture) will pop up with a pull-down menu with where you want to add them. You will choose GENERAL.
Make sure you check the box that says subscribers accept marketing.
Then upload your CSV file. You can keep the one I gave you as a master list (it’s also in Dropbox).
EXPORTING EMAILS
To export, go back to your menu panel. Up at the top-right, there are three dots. Click it, click EXPORT ALL PROFILES.
This will download an updated CSV list.
Yahoo might have a great way to import that, but if not, just select all the email addresses in the email column, copy, and paste into your BCC or whatever.
